Friday, November 13, 2009

How to install MySQL Enterprise Monitor agents in a failover environment

MySQL Enterprise Monitor is a tool to watch and analyze multiple MySQL environments from a single web based dashboard. More information is available on the MySQL homepage. Each MySQL instance is monitored by a small agent that connects to the MySQL instance and reads statistics that is sent to the MySQL Enterprise Monitor (MEM) Server.
That setup is very easy. But if the MySQL server is in a cluster failover configuration, there are some things to consider when installing the MEM agent:

What do you want?

Do you want to have two entries in the MEM dashboard for both physical servers?
This is good because:
  • You can monitor them separately, you can define different rules for both servers in case they offer different capabilities.
  • You can immediately see, which physical server runs the MySQL instance. The other entry will always report either "MySQL server down" or "MEM agent not reachable".
This is not so good because:
  • You cannot watch the data if a failover occurred. E.g. you can only see graphs for a specific physical host.
  • You get red alarms because the agent on the passive node cannot reach the MySQL instance. This alarm is harmless. But it will train you to ignore red alarms. Not good.
If you like this approach here is the description how to install.

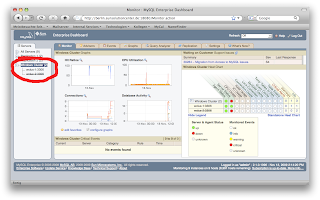
Do you want to see only one entry in the MEM dashboard that displays the data no matter, which physical server is running the instance at the moment?
This is good because:
  • You have continuous data even if a failover occurred during the period. E.g. you can watch the cache hit rate graph of your MySQL server and you will see only a dip where the failover took place.
  • You will not see false events like "MySQL server is down on the passive node". Of course it is down. That's why it is called the passive node ;-)
This is not so good because:
  • It's not so easy to see which physical server currently runs the MySQL instance: In the meta info on the dashboard screen you see the physical hostname that runs the MySQL instance.
  • You need to apply the same rules to both physical servers. This may be a problem if they have different capabilities, e.g. if the backup node is smaller.
If you prefer this approach here is the description how to install.
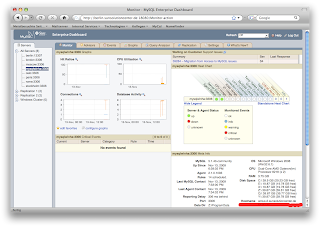
By the way: I recommend this way, as the disadvantages are really small and the installation is even a little easier. Both procedures work for all common HA frameworks like SunCluster, OpenHA Cluster, Linux Heartbeat, Microsoft Windows Cluster.

Installing MEM agent on a cluster on the logical host

The goal is to have only one entry in the Enterprise Monitor Dashboard that shows the status of the MySQL instance, no matter on which physical server in runs. There are two ways to achieve this:
  • You can install the agent on both physical nodes
  • You can install the agent on a shared storage.
In either case you have to make sure, that only one agent runs at a time. You have to integrate the agent into your cluster framework. I will not describe how this works, as it is highly dependant on your cluster framework.

The following description assumes, that you will install the agent on both physical nodes.

  1. Install the agent but DO NOT START the agent yet.

  2. Edit the [agent-installdir]/etc/mysql-monitor-agent.ini
    In the [mysql-proxy] section add the following line:
    agent-host-id=[logical hostname]
  3. Do steps 1. and 2. for the other cluster node as well.

  4. Include the agent in the cluster's failover group so that it will start automatically on that node, where the MySQL instance is running.

  5. Start the agent via the cluster framework.

  6. The entry in MEM will get the hostname of the first node that runs MySQL. Even after a failover this name will stay. You should change that name to the virtual hostname of the virtual ip adress of your MySQL service. Use the MEM BUI, choose the tab "Settings". From the secondary menu right below the tabs choose "Manage Servers". If you move the mouse over the server name a submenu will appear. Choose "Rename" and enter the name of the virtual IP.

Installing MEM agent in a cluster on the physical hosts

To install the MEM agent in a way that both physical servers are listed in the MEM dashboard, you have to install the agent on both physical nodes. But: Do not start the agent after the installation!
There are three different IDs in MEM: agent-uuid, mysql-uuid and host-id. Usually they are generated automatically and you will never notice these IDs. For more information about the meaning of the different IDs look at this very good explanation from Jonathon Coombes.
The agent stores the uuid and the hostid in a MySQL table called mysql.inventory. After a failover the other agent on the new node will notice "wrong" hostid and uuid entries in the inventory table. The agent will stop and ask you to TRUNCATE mysql.inventory. But with this procedure MEM creates a new instance, so all old data is lost. Not good for a failover environment.
So in case of a failover you have to provide the mysql.inventory table, that the agent expects.
And here is how you can achieve this:
  1. Install the MEM agent on the node that currently runs MySQL. Start the agent.

  2. Make a table that stores the hostid and uuid for every physical host:
    USE mysql;
    CREATE TABLE inventory_hostname LIKE inventory;
    DROP INDEX `PRIMARY` ON inventory_hostname;
    ALTER TABLE inventory_hostname ADD COLUMN (hostname VARCHAR(64));
    ALTER TABLE inventory_hostname ADD PRIMARY KEY (hostname,name);
    INSERT INTO inventory_hostname SELECT *,@@hostname FROM inventory;
    SELECT * FROM inventory_hostname;

    The newly created table should look like this:
    +--------+--------------------------------------+----------+
    | name | value | hostname |
    +--------+--------------------------------------+----------+
    | uuid | 96936e90-56bd-4eb1-aef3-e708d149a4cb | wclus-1 |
    | hostid | mac:{005056a138c10000} | wclus-1 |
    +--------+--------------------------------------+----------+

    (Notice that the hostid is based on the mac address in my case. Usually this is the public ssh host key.)

  3. Stop the agent

  4. Empty the inventory_table:
    TRUNCATE mysql.inventory;

  5. Failover the MySQL instance to the other node.

  6. Install and start the agent on the other node. It will save new values in inventory.

  7. Copy these new values to the inventory_hostname table:
    USE mysql;
    INSERT INTO inventory_hostname SELECT *,@@hostname FROM inventory;
    Both nodes should be visible in MEM dashboard right now.

    With every failover we need to populate the inventory table with the host-specific rows. Easiest way (and independent on the operating system and cluster framework) is to define an init-file:

  8. On both nodes create a file named [MySQL Basedir]/mysql_init_HA_MEM.sql with the following statements:
    USE mysql;
    REPLACE INTO inventory SELECT name,value FROM inventory_hostname WHERE hostname=@@hostname;

  9. On both nodes edit you my.cnf or my.ini file. In the section [mysqld] add the following line:
    init-file=[MySQL Basedir]/mysql_init_HA_MEM.sql
    (If you already have an init-file defined you can add the commands "USE mysql; REPLACE..." to you init-file.)

  10. Start all agents and try to failover the MySQL instance. Check that you init-file really modifies the inventory table.

Thursday, May 14, 2009

Installing MySQL in Solaris 10 zones / containers

Now that installing MySQL in Solaris zones is even officially supported by the MySQL support group (see http://www.mysql.com/about/legal/supportpolicies/policies-06.html#q03), the question is: What is the right way of installing MySQL in a zone. Of course this depends on what you want to achieve. The following description is based on Solaris 10. On Opensolaris this is different (somewhat easier, as there are no more sparse root zones.)

If you run a local zone as a whole root zone, you can easily install MySQL from tarball or the package installer.

If you run a local zone as a sparse root zone, there are different options:

First you cannot use the package installer, as this procedure will copy binaries to /usr/bin. But /usr/bin is inherited from the global zone and write protected. You have to use the tarball installation.

1. Make /usr/local/mysql writable
The tar ball will install in /usr/local/mysql. You can create a symbolic link in your GLOBAL ZONE:
> ln -s /localsoftware/mysql  /usr/local/mysql
This link points to a directory, that is not inherited. So in every zone /usr/local/mysql will point to a dedicated directory with write permission. You untar the software in the zone in /localsoftware

2. Make /usr/local writable
If you want no software from /usr/local in the global zone to be available in the local zones as well, you can use solution#1 even with /usr/local. So in every zone, /usr is inherited and write protected. But /usr/local points to a directory, that is writable. This is my personal favorit:
In the global zone:
> mv /usr/local /LOCAL
> ln -s /LOCAL /usr/local
and in the local zone
> mkdir /LOCAL
> cd /usr/local
> gtar -xzf /anywhere/mysql.tgz

3. Install in different location
You can untar the MySQL tarball in any other location, that is not inherited from the global zone. Maybe /opt/ ? Check with mount, what directories are loopback mounted from the global zone with read-only flag.

4. Install MySQL globally for all zones
You can untar MySQL in the global zone's /usr/local. Then every local zone has a MySQL installation as well. But then it is important, that all write access in MySQL is done to a writable directory, like /var/lib/mysql. Otherwise MySQL in the local zone will stop, because it cannot write it's logfile/errorfile/datafiles in /usr/local/mysql/data

Friday, February 27, 2009

Adding packages to zones

In Opensolaris 2008.11 you can create zones. But in contrast to zones in Solaris these Opensolaris zones do not contain packages from the global zone but a small set of dedicated packages, that are installed directly in the zone.
So there are no more sparse zones, that inherit the packages from the global zone and you have to install additional packages via pkg command. (No more pkgadd!)
If your local zone has no internet access you can install packages from the global zone as well. Although this is not documented. But the zoneadm -install does exactly this. Look at /usr/lib/brand/ipkg/pkgcreatezone
  1. Make sure the local zone is halted.
  2. From the global zone mount the local zone's root file system.
  3. Set the envrironment variable PKG_IMAGE=/wherever/the/rootfs/is/mounted
  4. Set the environment variable PKG_CACHE=/var/pkg/download
  5. Use the regular pkg command. It will install in the zoneroot: pkg install SUNWmypackage
  6. Unset at least PKG_IMAGE. Otherwise subsequent pkg install in the global zone will fail.
  7. Boot the local zone.

Sunday, February 22, 2009

5h of my life spoilt due to hacking

In my last post I suggested to clone zones and instead of running sys-unconfig I hacked the script, so that only /etc/nodename gets modified.
The script worked very well... It took 10 seconds to clone a zone. But after I installed MySQL and the monitoring agent, I failed monitoring the instances in the Enterprise Monitor. After "only" 5 hours of testing and re-installing I discovered that the Enterprise Monitor identifies the host via its ssh hostid, that was generated during install. Unfortunately all my clones had the same ssh hostid, so Enterprise Manager was a little confused.
What did I learn from these five hours?
  1. I will never again hack scripts that are written by people much smarter than me (Solaris engineering in this case).
  2. I can install zones regularly with zoneadm -z zonename install and everything is fine.
  3. I can clone a zone (with the standard script!) zoneadm -z zonename clone template but then MySQL Agent will fail and needs a TRUNCATE mysql.inventory on the local database. (Look at the agent's log file.) After that, the cloned zone will be monitored correctly.

Saturday, February 21, 2009

Cloning zones

THIS BLOG POST GIVES WRONG ADVICE. DON'T DO THIS!


As the zones use ZFS as root filesystem it's easy to do a zfs snapshot/clone to reproduce a zone. The different zones have only one difference: They differ in /etc/nodename, they have different rootpaths and they have different IP addresses.
I wrote a script to read from global's /etc/hosts the ip address. Zonerootpath is /zones/zonename and /etc/nodename must contain as well. The name of the zone is always identical to the hostname of the zone. That rule is not from OpenSolaris but from me.  ;-)

Here is my script: Beware: I hate to do a lot of checking. This is not for general use...

#!/bin/bash
echo "Creating zone $1 from zone TEMPLATE"
echo check if $1 does not already exist...
zoneadm list -cv | grep $1 && exit -1

echo -n "Retrieving TEMPLATE's IP: "
TEMPLATE_IP=$(grep TEMPLATE /etc/hosts | nawk '{print $1}')
echo $TEMPLATE_IP
echo -n "Retrieving $1's IP: "
NEW_IP=$(grep $1 /etc/hosts | nawk '{print $1}')
echo $NEW_IP

echo "Creating Command File"
rm /tmp/MBcommand 2> /dev/null
# We use the config of TEMPLATE zone and modify this
zonecfg -z TEMPLATE export | sed s/TEMPLATE/$1/ | sed s/$TEMPLATE_IP/$NEW_IP/ > /tmp/MBcommand

echo "generating new zone"
zonecfg -z $1 -f /tmp/MBcommand
echo "Installing new zone as snapshot"
zoneadm -z $1 clone TEMPLATE
echo done.

Very easy so far.
zoneadm clone will do a sys-unconfig to remove any network configuration from the clone. Acutally I don't like that. I don't want to run the whole sysidcfg configuration with every clone. So I did a hack:
AND HERE BEGINS MY PROBLEM. sys-unconfig IS NECESSARY FOR THE HOSTID. 
/usr/lib/brand/ipkg/clone is the shell script that will run, when you do a 'zoneadm clone'.
And here is the (malicious) call to /usr/sbin/sys-unconfig. I removed this and changed it to only write the new /etc/nodename file in the zone's root filesystem. Here are the last few lines of /usr/lib/brand/ipkg/clone:

/usr/sbin/mount -F zfs $zpds/$zpname/ROOT/$BENAME $zonepath/root || \
fail_incomplete "$f_zfs_mount"

#/usr/sbin/sys-unconfig -R $zonepath/root || fail_incomplete "$f_sysunconfig"
echo $zonename > $zonepath/root/etc/nodename
echo Run /usr/sbin/sys-unconfig manually. Command removed by Mario in $0
echo Instead edited only the /etc/nodename file with $zonename

/usr/sbin/umount $zonepath/root || fail_fatal "$f_umount"

exit $ZONE_SUBPROC_OK

Now I only have to populate /etc/hosts with my machines and run one command to have a completely installed and configured zone for my demo environment:

root@ap-mysql:~# ./create_zone_from_TEMPLATE berlin
Creating zone berlin from zone TEMPLATE
check if berlin does not already exist...
Retrieving TEMPLATE's IP:
Retrieving berlin's IP: 192.168.14.226
Creating Command File
generating new zone
Installing new zone as snapshot
Run /usr/sbin/sys-unconfig manually. Command removed by Mario in /usr/lib/brand/ipkg/clone
Instead only the /etc/nodename edited with berlin
done.


Creating a datacenter in one Solaris machine

There is a big event coming: Cebit!
And with that I took the task to implement a demo for MySQL Enterprise Monitor to show at the Sun booth. So I need a machine for the enterprise monitor and some machines to run MySQL databases. After all I need something to monitor.
So the setup will be an Ultra 24 desktop machine installed with OpenSolaris 2008.11 . For every machine I will install a zone to run a separate database and one zone to run the enterprise monitor.

So here is my first round of experiences: Installing a template container on OpenSolaris and cloning it to build four or five separate database machines. Let's go:


####################################################################################
# Creating ZFS filesystems for all zone root-fs and a zfs that's shared between global and all local zones for easy data exchange
####################################################################################

root@ap-mysql:/# zfs create -o mountpoint=/zones rpool/zones
root@ap-mysql:/# zfs create -o mountpoint=/zones/share rpool/zones/share


####################################################################################
# Create a template zone, that will be cloned for all demo zones
####################################################################################

root@ap-mysql:/# zonecfg -z TEMPLATE
TEMPLATE: No such zone configured
Use 'create' to begin configuring a new zone.
zonecfg:TEMPLATE> create
zonecfg:TEMPLATE> set zonepath=/zones/TEMPLATE
zonecfg:TEMPLATE> add inherit-pkg-dir
zonecfg:TEMPLATE:inherit-pkg-dir> set dir=/zones/share
zonecfg:TEMPLATE:inherit-pkg-dir> end
zonecfg:TEMPLATE> add net
zonecfg:TEMPLATE:net> set physical=e1000g0
zonecfg:TEMPLATE:net> set address=192.168.14.225/24
zonecfg:TEMPLATE:net> end
zonecfg:TEMPLATE> verify
zonecfg:TEMPLATE> commit
zonecfg:TEMPLATE> exit
root@ap-mysql:/# zoneadm list -cv
ID NAME STATUS PATH BRAND IP
0 global running / native shared
- TEMPLATE configured /zones/TEMPLATE ipkg shared

####################################################################################
# Now we have the TEMPLATE zone. Next step is to install the zone and boot it.
# CAVEAT: The machine needs internet access to install a zone. The software respository must be www.opensolaris.org in the moment... :-(
####################################################################################

root@ap-mysql:/# zoneadm -z TEMPLATE install
A ZFS file system has been created for this zone.
Authority: Using http://pkg.opensolaris.org/release/.
Image: Preparing at /zones/TEMPLATE/root ... done.
Installing: (output follows)
DOWNLOAD PKGS FILES XFER (MB)
Completed 52/52 7862/7862 72.41/72.41

PHASE ACTIONS
Install Phase 12939/12939
PHASE ITEMS
Reading Existing Index 9/9
Indexing Packages 52/52

Note: Man pages can be obtained by installing SUNWman
Postinstall: Copying SMF seed repository ... done.
Postinstall: Working around http://defect.opensolaris.org/bz/show_bug.cgi?id=741
Done: Installation completed in 518.993 seconds.

Next Steps: Boot the zone, then log into the zone console
(zlogin -C) to complete the configuration process


####################################################################################
# time to boot the zone
# prepare a second terminal window and start the zone's console with
# zlogin -C TEMPLATE
####################################################################################

root@ap-mysql:~# zoneadm -z TEMPLATE boot

####################################################################################
# In TEMPLATE's console, do the interactive sysidcfg procedure
# I like to install some other packages. The default set is too small for me
# Adding packages is easy: 'pkg install SUNWxyz'. Unfortunately you have to
# be in the internet to have access to www.opensolaris.org
# hopefully this will change in the future.
# Here is the list of packages I installed for the showcase:
# SUNWgnu-coreutils
# SUNWgcmn
# SUNWgtar    needed for installing MySQL tarball
# SUNWuiu8
# SUNWman    can't live without it
# SUNWless
# SUNWpkgcmds   to use pkgadd later with MySQL
####################################################################################

That's it. We have a zone called TEMPLATE. Next blog will be cloning to define 4 identical machines.

Saturday, February 14, 2009

Here we go...

After lots of motivation from colleagues now is the time: I will start my own blog.
Why? Is anybody interested in what I learn and see in my life? Maybe. 
So many times in the last years I learned things through blogs, recipes and private websites where people documented rather petty findings, or procedures that were useful for me, that I felt guilty for not sharing my own experiences.
Without other people's blogs I couldn't sync my phone, use most of the software or build funny electronic things like my barograph.

What will I blog about? Mostly it will be my work experience as a Systems Engineer with Sun. Technical stuff about MySQL and the tool ecosystem around it, Solaris, maybe a little hardware as well. I left the field of hardware some months ago after nearly ten years. But sometimes there are things with hardware that are so crazy, that I MUST blog about it... e.g. Brandon discovering that harddisks are emotionally sensitive. Do not shout at your disks!